Info
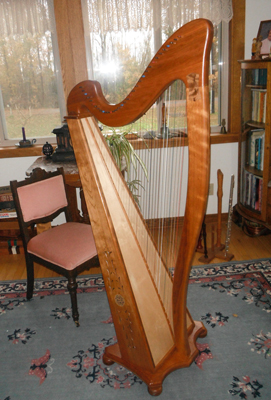
Gary has incorporated some innovative ideas to make this kit comparatively easy to assemble. All cutting is done for you, even the access holes in the back. The neck is drilled for tuning pins and guide pins. We put a large tenon inside the neck/pillar joint, eliminating the need for outer plates, though you may add decorative overlays if you like.
The flat soundboard and back are easy to install and then frame with solid hardwood trim strips that have veining grooves that you can highlight with black or gold paint to "outline" the soundboard. Plan on a 40-hour project, and take your time to finish and decorate this instrument for elegance.
You'll want a large work table, a few clamps, electric hand drill, and power sander, along with normal household hand tools.
Testimonials

This Fall I purchased a Regency Harp Kit from you folks.....I had previously built a Smart Harp kit and used it for two years to confirm that I really was interested in the harp... My first lessons were from Virginia Bethune at the annual Church Music Conference, Massanetta Springs, Harrisonburg, VA. She is a harp therapist and has introduced many, many folks to the harp.
The kit went together with only one or two "memorable moments". the results are better than ever I could have dreamed. When I played it the first time in our church, the audio technician exclaimed, "You bought one with the amplifier and speaker already inside!" No, it's just a Regency with full natural sound.
At first the carved sides didn't show up very well.... so after the satin finish was on, I used a dark burled cherry stain and darkened the cuts in the carvings. The circle behind the rosette was painted flat black before the installation.
I am 74 years old and never touched a harp until two years ago...... I suppose I'll never be a good "harpist", but I enjoy playing this one and that's what counts.
Ken Ries


